
Technology
Uncovering the Hidden Features of Apple Phones You Never Knew Existed
Apple phones are surprisingly powerful pocket-sized computers with tons of built-in features. However, most people don’t even know half of what these gadgets can do.
For example, did you know that you can use the iPhone’s camera as a document scanner? Or that you can enable a feature that allows first responders to access your medical info straight from the lock screen without needing your passcode?
Drag and Drop Between Apps
Until iOS 15, it wasn’t possible to move text, photos, or files between apps on an iPhone. But Apple has made multitasking a lot smoother with this handy feature, which is surprisingly easy to use.
First, open the source app that you want to drag from, such as a web browser or a messaging app. Next, select the text, photo, or file you wish to move. Then, tap and hold until you feel a little vibration. While keeping your finger pressed, use another hand to swipe up on the screen and reveal the Dock (on an iPhone without a Home button) or the App Switcher (on an iPhone with a Home button). Drag the selected item onto the destination app.
You can drag most types of media, including pictures, videos, audio files, and links. However, the destination app must be compatible and developers must implement the feature in their software. As such, you may find that some apps—especially third-party ones—do not support this feature.
Dragging your Media
Generally, dragging your media will trigger a pop-up menu for sharing options. For most situations, you can ignore the option and jerk your finger down the screen a bit until you start feeling haptic feedback. This will essentially cut out the subject of your photo or video and allow you to drop it into a different app, such as a gallery or editing suite.
Then, when you’re ready to drop your media, lift your finger. You can then use a second finger to navigate around the screen or, in some cases—such as rearranging scores within a setlist—a single finger will work just fine. You’ll also see icons that change in appearance depending on the context—such as a green plus sign to indicate that your item will be added, rather than moved or copied.
If you’re looking for an affordable Apple phone, check out Betta Home Living Discount Code for deals on budget-friendly Apple products. From iPhones to iPads, Betta Home Living offers discounts on a variety of Apple products. With the discount code, you can save even more on your purchase. Don’t miss out on the opportunity to get your hands on an Apple phone without breaking the bank. Head over to Betta Home Living today and start shopping!
Conceal Your Number
There are plenty of ways to keep your number private when making phone calls. You can use a burner number app, or a dedicated phone line or even block your number at a network level (depending on your carrier and service provider). But if you prefer to hide your number permanently, your iPhone might have a hidden feature to help you do so.
It turns out, you can conceal your caller ID on a per-call basis simply by pressing certain keys. It’s not an official feature, but it works nonetheless and could come in handy if you need to make a quick phone call from a public location or if you’re calling someone who you know doesn’t want your number revealed.
The process involves launching the Phone app, tapping the three dots in the top-right corner, and selecting “Settings.” Once you’re here, look for a button that says “Call settings” or similar. Most carriers allow you to block your caller ID on a per-call or permanent basis from here, though you’ll need to check your specific device’s instructions.
What’s more, over time your iPhone collects data about the places you frequent like work or the gym—called “Significant Locations.” Though Apple reassures users that this information is end-to-end encrypted and can only be viewed by the user, it’s easy to see how such a log of daily routines could fall into the wrong hands.
Fortunately, you can stop your iPhone from recording such details by accessing the “Significant Locations” section of your privacy settings. Then, you can delete your entire history of visits and departures or choose not to include them in the first place.
LED Flash Alerts
In addition to sound and vibration, the iPhone lets you know when you have incoming calls and messages using its LED flash next to its rear camera. But sometimes these alerts aren’t enough, like in noisy environments or when you’re trying to concentrate. To remedy this, you can enable your iPhone’s LED to blink when you get an incoming call or message, even when the phone is in silent mode.
Audio/Visual section
To activate this feature, open your iPhone’s Settings app and scroll down to the Audio/Visual section. You’ll see a slider labeled LED Flash for Alerts, which you can toggle on to make your iPhone’s LED light up when you receive calls and text messages. You’ll also see a switch labeled “Flash in Silent Mode” which you can flip on to allow the LED light to flash for notifications even when your iPhone is locked and its ringer is turned off.
Keep in mind that activating this feature can drain your battery a little more than usual, so you’ll want to turn it off when you don’t need it. Additionally, if you’re in a public place where other people might notice your iPhone’s LED light blinking, it can be distracting and possibly embarrassing. But if you use it responsibly, this little trick can be helpful in many situations. You can even try it out as a DIY lantern during a power outage or on your annual family camping trip. Simply put your iPhone’s light behind any transparency film and enjoy your very own makeshift projector. It’s the perfect alternative to an expensive and bulky movie projector. Just make sure to charge your phone beforehand.
Communication & Wireless Coupon Code offers a wide range of budget-friendly phone accessories. From phone cases to screen protectors, chargers to headphones, you can find everything you need to enhance your phone experience without breaking the bank. Check out their website for the latest deals and discounts on phone accessories.
Cast Harry Potter Spells
The wizarding world has a spell for everything, and Harry Potter fans are probably familiar with most of them. There are healing spells, combat spells, and even a few that are used for daily tasks. But the series also contains a few spells that didn’t make it into the films.
Divination is a branch of magic that can predict the future using various methods. Tea leaves, fire omens, crystal balls, palmistry, cartomancy (including the reading of conventional playing cards and tarot), and astrology are all forms of divination. Divination is taught by Professor Trelawney and Dolores Umbridge at Hogwarts, and later by Firenze after Trelawney is sacked by Umbridge in Harry’s fifth year.
Accio is a summoning charm that allows witches and wizards to retrieve items from any location. It’s very handy, and Harry uses it to retrieve his wand during the Triwizard Tournament. However, there’s also the more dangerous version of the spell called Imperio. This curse puts a person under the control of the caster. It can be used to torture a subject or, in a sadistic case, it can cause permanent amnesia and insanity. It’s so effective that Lord Voldemort and the Death Eaters cast this curse on their enemies regularly.
Another interesting magic spell is Glisseo, which turns staircases into a smooth surface like a slide. Dumbledore uses this during his apparition lesson with Harry in Half-Blood Prince, and Hermione casts it to allow them to safely descend the stairs in 12 Grimmauld Place during their duel with the Death Eaters at the end of Order of the Phoenix. It’s worth noting that side-along apparition is also possible, as shown when Dumbledore and Harry use this to return to their homes from the seaside cave in the sixth book.
Emergency Medical ID
Apple’s smartwatches and smartphones can do more than just track your heart rate or monitor your sleep. They can also help you meet your health goals and even serve as a lifeline in case of an emergency. This is especially true for iPhone users, who have the option to add potentially life-saving information to their devices with the Medical ID feature.
Essentially an enhanced version of the recommended “ICE” (In Case of Emergency) feature, which simply provides emergency contacts and basic medical information, iPhone’s Medical ID is available on all models starting with iOS 8. To set up Medical ID, open your iPhone’s Health app, tap your profile picture at the top-left corner, then tap the Medical ID tab in the bottom-right section of the screen.
Once you’re here, tap the Edit button and start adding information to your Medical ID. You’ll be asked to provide your name, contact information, and a short description of any medical conditions or allergies that you have. You can also choose to have a Medical ID display on your lock screen and enable the Share During Emergency Call feature that will let emergency services access your information when you’re on the phone with them.
It’s important to note that emergency medical information is only as helpful as it is accurate, so you should update your Medical ID with any new or amended information you have as soon as possible. It’s also worth pointing out that anyone who has access to your iPhone will be able to view the information in Medical ID, regardless of whether or not they have a passcode, so make sure you’re comfortable with sharing this kind of sensitive info with others ahead of time.
Conclusion
Essentially an enhanced version of the recommended, (In Case of Emergency) feature, which simply provides emergency contacts and basic medical information, iPhone’s Medical ID is available on all models starting with iOS 8. To set up Medical ID, open your iPhone’s Health app, tap your profile picture at the top-left corner, then tap the Medical ID tab in the bottom-right section of the screen. You can also choose to have a Medical ID display on your lock screen and enable the Share During Emergency Call feature that will let emergency services access your information when you’re on the phone with them.
Technology
Catch-Up TV and Replay on IPTV Smarters Pro: How to Watch Missed French Programmes in 2026

Published: 1 July 2026 | Last updated: 2 July 2026 | 11 min read
Catch-up TV in IPTV Smarters Pro lets French viewers watch missed programmes on TF1, France 2, M6, Canal+, and Arte within a 7 to 30 day replay window. Access it from the Catch-Up section in the app or directly from the EPG guide by tapping a past programme entry marked with a replay icon. The most common catch-up problem is a black screen when playback is attempted. The two most frequent causes are an expired replay window and a decoder mismatch: switching from ExoPlayer to VLC in Player Settings resolves the decoder issue in most cases.
What catch-up TV actually means in IPTV Smarters Pro for French viewers
Most French viewers know catch-up from official broadcaster apps like TF1+, France TV, M6+, and myCanal. IPTV Smarters Pro offers the same functionality but aggregated across all French channels in your Abonnement IPTV Smarters Pro Player subscription, rather than requiring a separate app for each broadcaster. One app, one interface, all French catch-up in one place.
Catch-up TV (television de rattrapage in French) allows viewers to watch a programme they missed within a defined window after its original broadcast. The major French free-to-air broadcasters offer this through their official apps: TF1 via TF1+, France Televisions via France.tv, M6 via M6+, and Arte via Arte.tv. Canal+ and beIN Sports offer limited catch-up through their own apps for subscribers.
IPTV Smarters Pro with an Abonnement IPTV Smarters Pro Player subscription replicates this across all these channels in a single interface. French viewers in Paris, Lyon, Bordeaux, or Marseille who missed a Tuesday evening TF1 drama or a Wednesday M6 series episode can find it in IPTV Smarters Pro’s Catch-Up section without switching apps, without creating separate accounts on TF1+ and M6+, and without navigating multiple recommendation systems that show different content.
This is the feature most French IPTV subscribers underuse. Many see the Catch-Up section in IPTV Smarters Pro after their initial setup and assume it is empty or not working because the Catch-Up library takes a few hours after subscription activation to populate fully on the Abonnement IPTV Smarters Pro Player server.
French viewers who have not yet installed the app can download IPTV Smarters Pro free from the Google Play Store on Android devices and Android TV boxes. The full catch-up TV section described in this guide is available in the Android version of IPTV Smasters Pro used with Abonnement IPTV Smasters Pro Player credentials.
How catch-up works technically in IPTV Smarters Pro
Catch-up in IPTV Smarters Pro works through the Xtream Codes API. Your Abonnement IPTV Smarters Pro Player subscription credentials give the app access to a time-shifted recording library stored on the provider’s server for each supported French channel. The app retrieves the list of available programmes by channel and date and presents them in the Catch-Up section. No additional configuration is required beyond your initial Xtream Codes login.
When a French channel broadcasts a programme at 21h00 on TF1, the Abonnement IPTV Smarters Pro Player server simultaneously records the stream and stores it in the catch-up library. This recording is available through IPTV Smarters Pro within 30 to 60 minutes of the broadcast ending, and remains accessible for the duration of the channel’s replay window (typically 7 days for TF1, France 2, M6, and Canal+, and up to 30 days for Arte).
The catch-up stream uses the same Xtream Codes credentials as your live TV access. This is why catch-up is more reliably configured on Xtream Codes connections than on M3U connections: the Xtream Codes API automatically exposes the catch-up library through the same login, while M3U playlists require separate catch-up URL construction that varies by provider.
How to access catch-up TV in IPTV Smarters Pro
Method 1: The Catch-Up section
From the IPTV Smarters Pro home screen, the main navigation includes Live TV, Movies, Series, and Catch-Up. Tap Catch-Up to open the dedicated replay library. IPTV Smarters Pro displays a list of French channels with available catch-up content from your Abonnement IPTV Smarters Pro Player subscription. Tap a channel such as TF1 or M6 to see all available programmes organised by date, from the most recent broadcast back through the full replay window.
Each entry shows the programme title, original broadcast date and time, and duration. Tap an entry to start watching. The programme plays in the same video player as live streams, with full pause, rewind, and fast-forward controls. This is the complete television de rattrapage experience within IPTV Smarters Pro, covering all French channels included in your Abonnement IPTV Smarters Pro Player subscription’s catch-up package.
Method 2: From the EPG guide
When your EPG is configured correctly for a French channel that supports catch-up, past programme entries in the channel guide display a small clock or replay icon. Tap the programme entry to open its detail view, then tap the play or replay button. This launches the catch-up stream directly without navigating to the separate Catch-Up section. For French viewers who use the EPG as their primary navigation tool, this is the fastest way to watch a missed programme.
The Abonnement IPTV Smarters Pro subscription from Abonnement IPTV Smasters Pro Player includes catch-up TV for TF1, France 2, France 3, France 4, France 5, M6, W9, TMC, Arte, Canal+, and beIN Sports within the replay windows set by each broadcaster. Catch-up activates automatically on Xtream Codes connections with no separate configuration required.
Which French channels support catch-up through Abonnement IPTV Smarters Pro Player
| French channel | Catch-up window | Typical content covered
|
|---|---|---|
| TF1 | 7 days | Prime-time drama, news, reality TV, major live events |
| France 2 | 7 days | News programmes, films, documentaries, Saturday magazine shows |
| France 3 | 7 days | Regional content, national news, cultural programmes |
| France 4 and France 5 | 7 days | Arts, children’s content, documentaries |
| M6 | 7 days | French and international series, reality TV, magazine programming |
| W9 and TMC | 7 days | Entertainment, imported series, reality content |
| Canal+ | Varies by content | Shorter window for films and sport, longer for Canal+ series originals |
| Arte | 30 days | European arts and culture, documentaries, European cinema |
| beIN Sports | 24 to 72 hours | Selected match replays, World Cup fixtures subject to rights restrictions |
French viewers who want to verify catch-up channel availability before subscribing can check the full list at abonnementiptvsmartersproplayer.com or ask the WhatsApp support team before purchase.
The black screen problem: why catch-up fails and how to fix it
The most common French IPTV catch-up complaint in 2026 is this: the programme appears in the catch-up library, you tap it, and the screen goes black. Playback never starts. This is not a subscription issue. The three most common causes are a decoder format mismatch, an expired replay window, or a temporary issue with the Abonnement IPTV Smarters Pro Player catch-up server. Each has a specific and simple fix.
Cause 1: Decoder format mismatch
Catch-up streams on French channels are often encoded in a different format from live streams. Live streams from TF1 and M6 typically use H.264 encoding which ExoPlayer handles without issue. Some catch-up recordings on the same channels use H.265 (HEVC) encoding or a specific container format that ExoPlayer does not handle correctly in older IPTV Smarters Pro builds, resulting in a black screen without error message.
The fix: go to Settings in IPTV Smarters Pro, then Player Settings, and change the video player from ExoPlayer to VLC. VLC supports a wider range of codec and container combinations than ExoPlayer for catch-up playback. French channels where catch-up gave a black screen on ExoPlayer will typically play correctly on VLC without any other change. If VLC also produces a black screen, try the third player option (SW player) in the same Settings menu.
Cause 2: The replay window has expired
A programme showing in the IPTV Smarters Pro catch-up library may have its recording window expire during your browsing session. If you open the Catch-Up section and see a TF1 programme listed that was broadcast 8 days ago, and the TF1 replay window is 7 days, the entry will be visible in the list but the stream URL will return a black screen because the recording has been deleted from the Abonnement IPTV Smarters Pro Player server. The programme listing updates at the next EPG refresh cycle and the expired entry will disappear. No action required beyond waiting for the next automatic refresh.
Cause 3: Catch-up server temporarily unavailable
Catch-up streams use a different server endpoint from live streams on the Abonnement IPTV Smarters Pro Player infrastructure. Occasionally the catch-up server undergoes maintenance or experiences brief load issues, particularly during the first 30 minutes after a major live programme concludes when thousands of viewers simultaneously attempt to access the catch-up recording. If live TV streams play correctly but all catch-up entries give a black screen, this is likely a temporary server issue. Wait 15 to 30 minutes and try again. Contact Abonnement IPTV Smarters Pro Player support via WhatsApp if the issue persists beyond an hour.
Watching World Cup 2026 match replays through catch-up
beIN Sports catch-up for FIFA World Cup 2026 matches in France is available through IPTV Smarters Pro within 24 hours of a match ending, typically for up to 72 hours. The final on 19 July may have a shorter or no catch-up window due to FIFA licensing restrictions. For the semi-finals and earlier rounds, match replays are reliably available in the Abonnement IPTV Smarters Pro Player catch-up library the morning after a late-evening CEST broadcast.
French viewers who miss a World Cup match due to work commitments can typically find the full match replay in IPTV Smarters Pro’s Catch-Up section the following morning. Navigate to Catch-Up, select beIN Sports 1 or whichever beIN Sports channel carried the match, and find the entry by date. The replay includes the full 90 minutes plus stoppage time and, where applicable, extra time and penalty shootout.
One practical limitation for World Cup catch-up viewing: IPTV Smarters Pro does not support downloading programmes for offline viewing. All catch-up streams require an active internet connection. A French viewer on a train without Wi-Fi cannot watch a downloaded World Cup replay through IPTV Smarters Pro. For offline viewing of World Cup replays, the official beIN Sports Connect app is the appropriate option as it offers download functionality for some content.
Catch-up for French series: following a season without missing episodes
The most consistent practical use of IPTV Smarters Pro catch-up for French household viewers is following French drama series and prime-time reality shows on TF1, M6, and France 2 without being tied to the live broadcast schedule. Rather than rearranging a Tuesday evening around TF1’s 21h00 drama, you watch it at any point within the 7-day window on your own schedule.
French series available through Abonnement IPTV Smarters Pro Player catch-up include the major TF1 prime-time dramas, M6 reality formats, France 2 prestige productions, and Arte co-productions within Arte’s generous 30-day window. The catch-up library also includes French news programmes, which allows viewers in other time zones or on late-working schedules to watch the 20h00 TF1 and France 2 evening news at their convenience rather than live.
French viewers who want to verify catch-up availability for specific channels and programmes before subscribing can confirm coverage with the Abonnement IPTV Smarters Pro Player support team via WhatsApp before purchase. Visit abonnementiptvsmartersproplayer.com to access the support contact and review catch-up channel details for current plans.
Catch-up on mobile: iPhone, iPad and Android with IPTV Smarters Pro
Catch-up TV through Abonnement IPTV Smarters Pro Player works identically on mobile as on television. The Android mobile app available from the Google Play Store includes the full Catch-Up section with all French channels from your subscription. iPhone and iPad users access the same catch-up library through Smarters Player Lite on the Apple App Store.
Mobile catch-up viewing consumes approximately 700 MB to 1.5 GB of mobile data per hour depending on stream quality. French viewers on mobile data plans from Orange, Free, SFR, or Bouygues with limited monthly allowances should use Wi-Fi for catch-up viewing of full-length programmes and reserve mobile data for short clips or news segments.
Frequently asked questions
Why is the Catch-Up section empty in IPTV Smarters Pro after I subscribed to Abonnement IPTV Smarters Pro Player?
The catch-up library takes a few hours to populate after a new subscription is activated. The Abonnement IPTV Smarters Pro Player server needs to index available recordings for your account before they appear in IPTV Smarters Pro’s Catch-Up section. If the section is still empty after 6 hours, contact Abonnement IPTV Smarters Pro Player support via WhatsApp to confirm catch-up is active on your plan.
Why does TF1 catch-up give a black screen on my Firestick?
The most likely cause is a decoder format mismatch between ExoPlayer and the TF1 catch-up stream format. Go to Settings, then Player Settings in IPTV Smarters Pro and switch from ExoPlayer to VLC. TF1 catch-up streams that produce a black screen on ExoPlayer almost always play correctly on VLC without any other change to your Abonnement IPTV Smarters Pro Player subscription or Xtream Codes credentials.
How far back can I watch catch-up TV for French channels through IPTV Smarters Pro?
For TF1, France 2, M6, Canal+, and most French TNT channels, the replay window is 7 days. For Arte, it is 30 days. beIN Sports catch-up is 24 to 72 hours for most content. These windows are set by the channel’s replay rights agreements and apply equally through IPTV Smarters Pro and through the channels’ official apps.
Can I watch World Cup 2026 match replays in IPTV Smarters Pro?
Yes, for most matches. beIN Sports catch-up through Abonnement IPTV Smarters Pro Player is available within 24 hours of a match ending and typically accessible for up to 72 hours. The World Cup final on 19 July may have a reduced catch-up window due to FIFA licensing terms. Quarter-final and semi-final replays are reliably available the morning after each match.
Does catch-up in IPTV Smarters Pro work the same on Samsung TV as on Firestick?
The catch-up content from Abonnement IPTV Smarters Pro Player is the same on all devices. The interface for accessing catch-up may differ slightly between the Samsung Tizen version and the Android Firestick version of IPTV Smarters Pro, but all French channels with catch-up in the subscription are accessible on both. If catch-up shows a black screen on Samsung TV, the Samsung Tizen app may lack VLC decoder switching. Using a Firestick or Android TV box via HDMI gives access to the full IPTV Smarters Pro Android build with complete decoder switching options.
Technology
M3U vs Xtream Codes API: Which IPTV Connection Method Works Better for French Subscribers?

Updated June 2026 | 9 min read
Use Xtream Codes API. It loads channels progressively instead of downloading the entire playlist at once, auto-syncs your EPG without any manual configuration, and displays your subscription expiry date and connection count directly inside IPTV Smarters Pro. M3U is the right choice only when your player does not support Xtream Codes, such as VLC, or when your provider does not offer Xtream Codes credentials. If your provider offers both, always set up Xtream Codes first.
The question every new French IPTV subscriber faces
The moment you open IPTV Smarters Pro for the first time and tap Add New User, the app presents you with a choice that many new French subscribers find confusing: Login with Xtream Codes API or Load Your Playlist (M3U URL). Both methods connect you to your IPTV subscription and give access to the same channels. But they work in fundamentally different ways under the hood, and those differences produce noticeably different experiences in terms of loading speed, stability on large French channel lists, EPG guide functionality, and what happens when your subscription details need to be updated.
Understanding the distinction between M3U and Xtream Codes is not purely technical knowledge for French viewers. It has practical consequences for every household running a subscription that covers 15,000 or more channels, which is the typical range for French-market providers that include Canal+, beIN Sports, RMC Sport, and full French TNT in a single plan.
What is an M3U URL and how does it work?
M3U is a plain-text playlist format that originated in the 1990s as a way to create audio playlists. The format was later adapted for IPTV use because its structure, a list of URLs with optional metadata, maps naturally to a channel list where each entry points to a streaming address. When your French IPTV provider gives you an M3U URL, they are giving you a link to a text file hosted on their server that contains every channel in your subscription, formatted as a long list of stream addresses.
When you load an M3U URL in IPTV Smarters Pro, the app sends a request to that URL and downloads the entire file before displaying anything. On a small subscription with 2,000 channels, this file might be a few megabytes and load in ten to fifteen seconds. On a typical French IPTV subscription covering 15,000 live channels plus 50,000 VOD titles, the M3U file can reach 30 to 100 MB in size. On a Firestick Lite with 1 GB of RAM, downloading and parsing a 100 MB M3U file before displaying a single channel is a significant operation that can take several minutes and sometimes causes the app to crash before completing.
The M3U format also embeds your username and password directly inside the URL itself, which creates a specific type of problem: every time your credentials change, your M3U URL changes. If your French provider resets your password or issues you new credentials, the M3U URL you have saved in the app becomes invalid immediately and must be replaced with the new URL.
When M3U is the right choice for French users
- Your IPTV player does not support Xtream Codes API. VLC Media Player, Kodi’s IPTV Simple Client, and some older Smart TV apps in France accept only M3U format.
- Your provider does not offer Xtream Codes credentials. Some smaller French providers use simpler server backends that generate M3U playlists but do not implement the Xtream Codes API.
- You need to share a static channel list with a specific device or use IPTV on VLC as a diagnostic tool to test individual stream URLs.
What is Xtream Codes API and how does it work?
Xtream Codes is a server management platform developed specifically for the IPTV industry. It provides a complete backend for IPTV providers to manage subscribers, channels, VOD content, and stream delivery. When a provider gives you Xtream Codes credentials, they are giving you three pieces of information: a server URL, a username, and a password. These three items allow IPTV Smarters Pro to communicate directly with the provider’s server through an API rather than downloading a static file.
The key difference from M3U is that Xtream Codes loads content on demand rather than all at once. When you open IPTV Smarters Pro and navigate to Live TV, the app sends a request to the server for the live channel list and receives only the category structure first. When you select the Sports category, it fetches the channels within that category. When you select a channel to watch, it fetches the stream URL for that specific channel at that specific moment. The device memory is used for playback, not for holding a complete copy of every French and international channel in your subscription.
French viewers who subscribe via Abonnement IPTV Smarters Pro through IPTV Smarters Pro Hub receive Xtream Codes credentials by default in their welcome email. This means the three-field setup described in this guide works immediately after purchase, with no M3U download delay and no separate EPG URL to configure.
When Xtream Codes is the right choice for French users
- You use IPTV Smarters Pro or TiviMate as your primary app. Both support Xtream Codes natively.
- Your French IPTV subscription covers a large channel list of 10,000 or more channels. Xtream Codes handles these without the loading delays or crashes that M3U produces on large lists.
- You want automatic EPG synchronisation without configuring a separate XMLTV URL for French channel schedules.
- You want to see your subscription expiry date and connection count inside the app.
Direct comparison table
| Feature | M3U URL | Xtream Codes API
|
|---|---|---|
| Setup | One URL to paste | Three fields: server URL, username, password |
| Initial loading time on large French lists | 2 to 5 minutes on 15,000 channel lists | Under 10 seconds regardless of list size |
| Device memory usage | High, entire playlist loaded at once | Low, content loaded category by category |
| EPG TV guide for French channels | Requires separate XMLTV URL configuration | Auto-syncs from server, no configuration needed |
| Stability on older devices | Can crash on Firestick Lite with large lists | Stable regardless of list size |
| Special characters in password | Breaks the URL format | No issue, entered as plain text field |
| Subscription info visible in app | Not visible | Expiry date and remaining connections shown |
| App compatibility | Works in VLC and all apps | Works in Smarters Pro and TiviMate, not VLC |
| When credentials change | Entire URL must be replaced | Only the changed field needs updating |
| VOD and series access | Included if provider sends complete M3U | Always included and properly categorised |
Why Xtream Codes matters specifically for French IPTV subscriptions
French IPTV subscriptions carry some of the largest channel lists available on any regional market. A standard French-market subscription includes all French TNT free-to-air channels, the complete Canal+ group, beIN Sports 1 to 4, RMC Sport 1 to 3, multiple Arabic language packages, English and Spanish international content, children’s channels, news channels from around the world, and a VOD library that commonly exceeds 50,000 titles. Total M3U playlist sizes for comprehensive French subscriptions frequently exceed 50 MB.
On a Firestick Lite with 8 GB of storage and 1 GB of RAM, loading a 100 MB M3U file is a serious challenge. The app must download the entire file, parse it line by line to extract channel names and stream URLs, build the category structure, and load thumbnail images before showing you anything. This process regularly takes 3 to 5 minutes on slower devices and occasionally causes the app to crash when available memory is exhausted before parsing completes.
Xtream Codes bypasses this entirely. The initial connection fetches only a category index, which is a few kilobytes. You see your channel categories in seconds. A French subscription covering 70,000 total items loads its opening screen as fast as a subscription covering 500 channels because the initial request is the same size in both cases.
Most French IPTV providers that offer serious infrastructure now provide Xtream Codes as their primary connection method. The team at IPTV Smarters Pro Hub delivers Xtream Codes credentials by default with every subscription. This means faster channel loading, automatic EPG synchronisation covering all French channels including TF1, France 2, Canal+, and beIN Sports, and fewer setup errors compared to using a raw M3U link. If your current French provider only offers M3U, it is worth asking whether Xtream Codes credentials are available on your account.
Common problems caused by choosing the wrong connection method
My M3U URL stopped working after I reset my password with my French provider
M3U URLs embed credentials directly in the URL string. Changing any part of your credentials invalidates the entire URL. Your provider must send you a new M3U link. With Xtream Codes, you update only the password field in the app and reconnect. No new URL is needed and no other settings change.
My M3U loaded successfully but the EPG guide shows no programme information for French channels
M3U playlists do not carry EPG data. To see programme schedules for French channels with M3U, you must separately configure an XMLTV EPG URL in IPTV Smarters Pro’s EPG settings. Your provider should supply this URL on request. With Xtream Codes, the EPG synchronises from the server API automatically without any additional configuration.
IPTV Smarters Pro crashes when loading my M3U playlist on Firestick
Your M3U playlist is too large for the device’s available memory. This is the most common cause of this crash on Firestick Lite and older Firestick 4K models used by French viewers. Switch to Xtream Codes API. Contact your provider and ask for the server URL, username, and password. These credentials provide access to exactly the same French and international content as your M3U link but through progressive loading that works reliably regardless of list size.
Xtream Codes login says Invalid Details but my M3U URL works fine
The server URL for Xtream Codes must include the port number. If your French provider gave you server.example.com as the Xtream Codes address, the correct format is http://server.example.com:8080 with the colon and port number included. This missing port number is the single most common Xtream Codes configuration error among French subscribers.
Getting Xtream Codes credentials from your provider
If your French provider has so far only sent you an M3U URL and you want to switch to Xtream Codes, contact their support and ask specifically for your Xtream Codes login details or server URL, username, and password. Any provider whose backend runs on Xtream Codes panel software can generate these instantly. Many providers simply omit them from the default welcome email because a portion of their subscribers use M3U-only players.
For French viewers currently evaluating providers, the IPTV Smarters Pro app itself is free on Android via the Google Play Store and on iPhone via the Apple App Store as Smarters Player Lite. Visit iptvsmartersprohub.com to confirm that Xtream Codes credentials are delivered as standard in the welcome email. The site also lists the full French channel coverage including TF1, France 2, M6, Canal+ group, and the complete beIN Sports and RMC Sport lineup, so you can verify your most-watched French channels are included before purchasing.
Frequently asked questions
Can I use both M3U and Xtream Codes in IPTV Smarters Pro at the same time?
Yes. IPTV Smarters Pro supports multiple user profiles simultaneously. You can add your Xtream Codes login as one profile and your M3U URL as a second profile. Switch between them from the main user selection screen. Most French users keep Xtream Codes as their primary profile and use the M3U profile occasionally for diagnostic purposes or when testing in VLC.
Does the M3U URL give access to the same French channels as Xtream Codes?
Yes, provided your provider sends a complete M3U that includes Live TV, VOD, and Series. Some providers send a Live-only M3U file that omits the VOD library. With Xtream Codes, all content types are always included and properly separated into categories within the app.
What is an XMLTV URL and do I need one with Xtream Codes?
An XMLTV URL points to a file containing Electronic Programme Guide data covering French and international channel schedules. If you use M3U, you need to configure a separate XMLTV URL in the EPG settings to see programme guides. If you use Xtream Codes, EPG data syncs automatically from the server. No XMLTV URL configuration is needed.
My French provider only gave me an M3U link. How do I find my Xtream Codes credentials?
Contact your provider’s support and ask for your Xtream Codes credentials or portal login details. Any provider running Xtream Codes panel software can provide these immediately. If your provider cannot supply Xtream Codes credentials at all, their backend may not support the protocol and M3U is your only option with that provider.
Par un journaliste spécialisé dans les applications de streaming et les technologies Smart TV pour le marché français.
Le choix de l’application IPTV est souvent la première question que se posent les nouveaux abonnés français après avoir souscrit un abonnement. La réponse dépend presque entièrement de l’appareil que vous utilisez : un utilisateur Samsung Smart TV n’a pas accès aux mêmes applications qu’un utilisateur de Fire Stick, qui lui-même n’a pas les mêmes options qu’un utilisateur Android TV. Ce comparatif détaille les meilleures options pour chaque configuration.
Pour les Samsung Smart TV : IBO Player
Les Smart TV Samsung équipées de Tizen OS (modèles 2018 et ultérieurs) ont accès à l’application IBO Player directement depuis le Samsung Smart Hub, sans manipulation spéciale. IBO Player est gratuit, supporte les formats M3U et Xtream Codes, dispose d’un guide des programmes complet et offre les fonctions de rattrapage lorsque le prestataire les a implémentées.
Point crucial pour les utilisateurs français : après installation, configurez le fuseau horaire de l’EPG sur Europe/Paris dans les paramètres d’IBO Player. Sans cette correction, tous les horaires de programmes français s’afficheront décalés d’une heure, ce qui rend le guide inutilisable. Un abonnement IPTV correctement configuré avec IBO Player sur une Samsung permet d’accéder à l’ensemble des chaînes françaises dans une interface aussi confortable que celle de la box de votre opérateur.
Note importante : TiviMate n’est pas disponible sur Samsung. Les Samsung utilisent le système d’exploitation Tizen, qui n’est pas Android. TiviMate est une application Android et ne peut pas fonctionner sur Tizen, quelle que soit la version du logiciel de votre téléviseur.
Pour les LG Smart TV : IPTV Smarters Pro
Les LG Smart TV équipées de WebOS (modèles 2019 et ultérieurs) ont accès à IPTV Smarters Pro depuis le LG Content Store. IPTV Smarters Pro est disponible nativement sans sideloading, s’adapte parfaitement à la télécommande Magic Remote de LG et offre une interface programme claire. IBO Player est également disponible sur LG.
IPTV Smarters Pro sur LG propose un affichage EPG en grille particulièrement lisible sur les grands écrans (55 pouces et plus), avec les chaînes en liste à gauche et la grille de programmes à droite. Pour naviguer rapidement entre les chaînes françaises avec la télécommande LG, créez un groupe de favoris contenant vos 10 à 15 chaînes les plus regardées. Des ressources comme 01net publient régulièrement des comparatifs d’applications IPTV pour LG et Samsung.
Pour le Amazon Fire Stick : IPTV Smarters Pro ou TiviMate
Le Fire Stick d’Amazon est la plateforme IPTV la plus populaire en France après les Smart TV, notamment parce qu’il transforme n’importe quelle télévision équipée d’un port HDMI en dispositif de streaming.
IPTV Smarters Pro : disponible directement depuis l’Amazon Appstore, sans sideloading. Recherchez ‘IPTV Smarters Pro’ dans le catalogue du Fire Stick, installez et entrez vos identifiants fournis par votre prestataire. C’est la solution la plus simple pour les utilisateurs qui n’ont pas envie de manipulations techniques. Pour consulter les différents forfaits IPTV et choisir le plus adapté, votre prestataire vous communiquera les identifiants de connexion dans les minutes suivant la souscription.
TiviMate Premium : l’application IPTV la plus avancée disponible sur Fire Stick, particulièrement appréciée pour sa vue multi-écrans (regarder plusieurs matchs de football simultanément) et son guide des programmes exceptionnel. TiviMate nécessite un sideloading via l’application Downloader (environ 10 minutes de manipulation) et une licence Premium à environ 9 euros par an. TiviMate est le choix des utilisateurs qui veulent le meilleur EPG possible et les fonctions les plus avancées.
Pour les Android TV et Google TV : TiviMate
Sur les appareils Android TV (Nvidia Shield, Xiaomi Mi Box, TCL Google TV) et Google TV (Chromecast avec Google TV, Sony Bravia XR), TiviMate s’installe directement depuis le Google Play Store sans aucun sideloading. C’est la configuration idéale pour TiviMate : les performances sont meilleures que sur Fire Stick, le catalogue complet est accessible nativement.
L’activation de TiviMate Premium (9 euros/an via l’application TiviMate Companion sur votre smartphone Android) débloque la vue multi-écrans pour les matchs simultanés, l’enregistrement sur clé USB ou NAS, et le rattrapage avancé. Votre abonnement Smart IPTV fonctionne identiquement sur Android TV en entrant simplement vos identifiants Xtream Codes ou votre URL M3U.
Pour iPhone et iPad : IPTV Smarters Pro
TiviMate n’existe pas en version iOS. Pour les utilisateurs Apple, IPTV Smarters Pro est disponible sur l’App Store et constitue la meilleure option. GSE Smart IPTV est une alternative populaire auprès des utilisateurs français sous iOS, avec une interface légèrement différente et un bon support EPG pour les chaînes françaises.
Pour une utilisation sur iPhone via la 4G ou 5G, il est recommandé de réduire la qualité de flux à 720p dans les paramètres de l’application pour éviter une consommation data excessive et des problèmes de buffering sur les connexions mobiles variables. Des ressources comme CNET France proposent des tutoriels réguliers sur la configuration des applications IPTV sur les appareils Apple.
Foire aux Questions
TiviMate est-il disponible sur Samsung Smart TV ?
Non. TiviMate est une application Android exclusivement. Les Samsung Smart TV fonctionnent sous Tizen OS, qui n’est pas Android. Il est impossible d’installer TiviMate sur n’importe quel Samsung Smart TV, quelle que soit l’année du modèle. Si vous souhaitez utiliser TiviMate sur l’écran de votre Samsung, branchez un Fire Stick ou une box Android TV sur le port HDMI de votre Samsung.
Quelle est la meilleure application IPTV pour regarder le foot en France ?
TiviMate Premium sur Fire Stick ou Android TV, pour sa fonctionnalité de vue multi-écrans qui permet d’afficher jusqu’à 4 matchs simultanément sur un seul écran, avec basculement audio entre les fenêtres. Cette fonctionnalité n’existe dans aucune autre application IPTV. Pour les utilisateurs Samsung ou LG, la vue multi-écrans n’est pas disponible nativement — il faut connecter un Fire Stick pour accéder à TiviMate.
Peut-on enregistrer des programmes avec l’IPTV ?
L’enregistrement est possible avec TiviMate Premium uniquement, sur Fire Stick ou Android TV, via une clé USB ou un stockage réseau (NAS). L’enregistrement se fait en temps réel sur le flux HLS reçu, en format TS, lisible sur n’importe quel lecteur vidéo. Les autres applications (IPTV Smarters Pro, IBO Player, GSE Smart IPTV) ne disposent pas de fonction d’enregistrement local.
Ce comparatif reflète les fonctionnalités des applications à la date d’avril 2026. Les applications évoluent régulièrement. Vérifiez les disponibilités dans les magasins d’applications de votre appareil.

Catch-Up TV and Replay on IPTV Smarters Pro: How to Watch Missed French Programmes in 2026

M3U vs Xtream Codes API: Which IPTV Connection Method Works Better for French Subscribers?

Quelle Application IPTV Choisir pour sa Smart TV en France : Comparatif 2026

Why Smaller Teams Are Outperforming Larger Organizations: Sabeer Nelli Explains the Shift

Modern Interior Design Services in Bangkok: Transform Your Space Today

TiviMate Catch-Up TV: How Terugkijken Works for Belgian and Dutch Viewers (And When It Does Not)

Paying for IPTV in the Netherlands: iDEAL, Cancellation Rights, and What Your Provider Owes You
How to Watch Dutch and Belgian TV During Your Vacation (Without a VPN That Half-Works)
IPTV for Dutch Families: Children’s Channels, Parental Controls, and What Parents Actually Need to Know
The Dutch Sports Fan’s Television Problem (And Why IPTV Is the Only Honest Answer)

How IPTV is Transforming Home Entertainment Across the Netherlands: A Complete Practical Guide for Dutch Viewers in 2026
The Dutch Viewer’s Complete Guide to IPTV: What It Is, How It Works, What You Can Watch, and What to Expect Before You Start

Vograce Acrylic Stands – Perfect for Merch & Promotions
Can Switching to IPTV Help French Households Reduce Their Monthly Bills?

Can Switching to IPTV Help Dutch Households Reduce Their Media Costs?
Is Trading Is The Best Investment Option After Retirement?

The Ultimate Guide to 35mm Film Developing Lab

10 Things to Do in Punta Mita

Save on Campervan Rentals with a roadsurfer Gutscheincode

Best Things to Do in New York City – Ultimate Travel Guide

Explore New Real Estate Programs in Marrakech

Tailored Tours to Switzerland | Private & VVIP Experiences
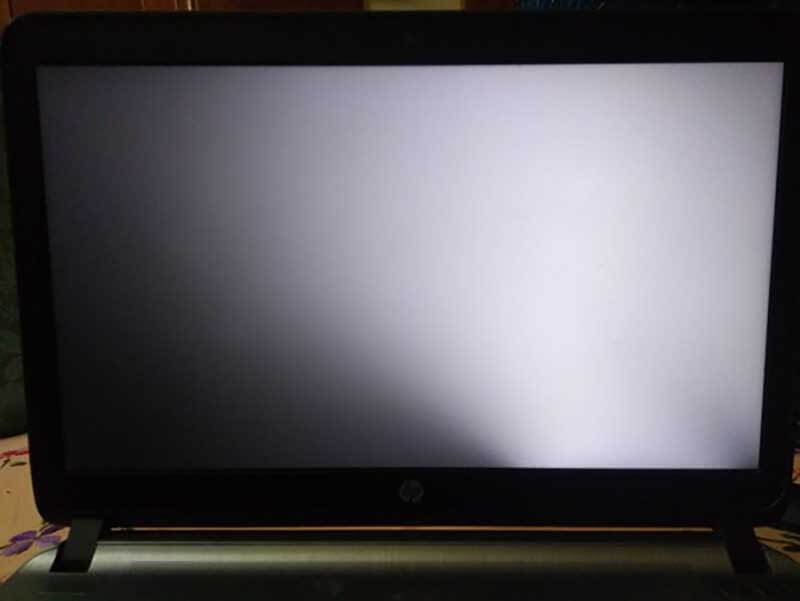
Why is there a white spot on my laptop screen?

How to Be the Best Real Estate Agent Murfreesboro

Find the Best Real Estate Agents Main Line
Shana Roberts Northbrook | Discover Her Story

Throne Of Seal Insert E108 Pan Xiuyu

Guide to Buying Testosterone Propionate Safely and Effectively

Effective Property Management in Marrakech Morocco

The Ultimate Guide to Wedding Photographers Charlotte
-

 Gaming6 months ago
Gaming News: The Ever-Evolving World of Video Games in 2025
-

 Health4 months ago
Expert Eye Care in the Southern Suburbs: Your Guide to Finding a Premier Optometrist in Tokai
-

 Health4 months ago
Vision Excellence on the West Coast: Your Guide to Finding a Top Optometrist in Milnerton
-

 News4 months ago
Heathridge Partners Tokyo Japan on the Value of Wealth Simplicity in a Complex World
-

 Home Improvement4 months ago
Roofing Services in Orem: Trusted Orem Roof Company for Lasting Protection
-

 Travel4 months ago
Discover with a Leading Morocco Travel Company
-
 Entertainment4 months ago
Can Switching to IPTV Help Dutch Households Reduce Their Media Costs?
-
 Entertainment4 months ago
Can Switching to IPTV Help French Households Reduce Their Monthly Bills?