
General
Best Step By Step Flower Drawing For Kids | Tutorial
Drawing For Kids how to draw flowers is one of the most attractive topics for children because they are among the most beautiful things that nature has to give. This article will discover a straightforward, kid-friendly method for drawing four different kinds of flowers.
Recently, doodles have become a popular art form, especially with the growth of bullet journaling and personalized planner movements. Drawing For Kids We want to show you how to use your artwork to bring your journal and notebook pages to life. Kids can easily engage in floral doodling thanks to these lessons on how to draw flowers step by step.
Children’s Drawing Lessons: Flowers
We are fortunate to have several outstanding artists on our Woo! Jr. team. Although I believe I am creative, I haven’t had a lot of practice sketching. Therefore, my artistic drawing ability isn’t exactly what it could be. I am so excited about this collection of printables that I can’t control it.
You will guide yourself through creating the flower from the first to the last line on each page. The accomplishment, in the end, is commendable, and the instructions are clear and simple. You can create your gorgeous bouquet from the flowers that inspire you once you complete each sketching session.
They only require some paper and crayons. Children can enjoy learning about colors and forms by looking at the vibrant floral painting BYJU has designed. Children will enjoy drawing and exploring the many color gradations with crayons, paintbrushes, chalk, or markers. Children’s flower paintings could also be used to teach them about the seasons in nature.
How to Draw a Flower Step by Step
- Draw two parallel lines with very little space between them, starting at the center of the bottom of the drawing sheet and moving upward.
- In the previous stage, we drew two parallel lines, and at their intersection, we drew a small circle at their tops.
- Draw a U shape with the points attached to the smaller circle, as shown in the illustration below.
- Create the leaves of the flower by drawing two curves, one on either side of the parallel lines. The edges of the curves should be drawn together.
- Finally, on the bottom of the drawing sheet, sketch some blades of grass and the veins in the leaves.
- Now, color the grass and leaves a vibrant green and the bloom a deep violet.
Simple Flower Drawing in Steps
- To finish the diagram, draw two horizontal lines with spaces between them. Then, as shown below, use a curve to join the ends of these parallel lines.
- From the second parallel line, draw two sloppy lines downward. To complete our flowerpot, connect these crooked lines with straight ones.
- Draw two taller parallel lines at the pot’s top line. Next, draw a second set of parallel lines just a little shorter in height. Finally, make a second pair of parallel lines that are much more closely spaced.
- Now that the detailed instructions for creating the flower in the prior tutorial have been finished create three blossoms as shown below.
- Draw the leaves for these three flowers similarly, and then use the black marker to outline your work.
- Step-by-step guidelines for drawing a flower in a vase.
Easy Step-By-Step Flower Drawing
- The bottom ends of these curves must be joined by a line that is primarily straight but slightly bent, as shown below. It is important to draw two curves with a gap between them.
- Starting from the top of the curves, begin sketching two sloppy lines upward. When you’re done, connect these crooked lines with a straight line.
- Now that we’ve started removing the leaves, sketch the foliage of the flowers in the vase, as shown in the illustration below.
- Now that the leaves have been sketched, we’ll use the same method we used to create the flower container to sketch the stems of the flowers.
- Draw Vs., then make tiny circles at the top of each stem. It arises from each circle, like in the illustration below.
- To complete the flower petals, you must link the V points.
7: Add a design to the vase now to make it look even more stunning, and after you’re through, don’t forget to outline the flower vase sketch completely. - Fill in the floral drawing with color.
- As seen below, use pleasing colours to complete the flower vase drawing.
How to draw a floral arrangement
- Let’s start by sketching a downward curve because we will take off the bouquet’s cover. Then, draw two sloppy lines pointing downward from the curve’s two ends. Next, draw two curves pointing upward from the curve’s upper ends using a joint of form edge. Finally, we will take off the bouquet’s cover.
- Draw additional flower types now, including roses and tulips. You could also draw the flowers we already drew in the earlier steps. Create the same arrangement of three or four flowers as in the illustration below.
- As shown in the following image, draw some flower leaves and a knot to decorate the bouquet’s cover.
- Finally, color the flower arrangement in enticing hues. To finish the painting off neatly, trace the outline of the flower arrangement with a black marker.

Farming has always played a significant role in Native American culture. Animated Mississippian Maize captures this rich history in a visually engaging way. It showcases how ancient communities relied on maize for survival and trade. This animation connects the past to the present, helping viewers appreciate indigenous agricultural expertise. Simple storytelling and digital tools bring forgotten traditions back to life. Let’s explore how this animation sheds light on Native farming.
Key Takeaways
- Animated Mississippian Maize preserves indigenous farming traditions.
- It highlights the deep connection between Native people and agriculture.
- The animation brings history to life for modern audiences.
- Understanding Mississippian maize farming enriches historical knowledge.
- Digital tools help spread awareness of traditional farming techniques.
The Importance of Maize
Maize was more than just a crop—it was a lifeline. Indigenous communities used maize for food, trade, and ceremonies. Animated Mississippian Maize highlights how farming techniques evolved, ensuring sustainability.
“Maize farming shaped the economy and culture of Mississippian societies.”
By studying these methods, we gain insight into efficient and eco-friendly agriculture. Traditional planting strategies, like the Three Sisters method, remain valuable today.

Farming Techniques in Animation
Animation breathes life into historical knowledge. Animated Mississippian Maize uses visuals to demonstrate planting, harvesting, and storage. It highlights how indigenous farmers cultivated maize alongside beans and squash. These techniques improved soil fertility and ensured food security.
“Traditional farming methods emphasize sustainability and resourcefulness.”
Educators can make history more engaging by incorporating animation. This approach helps students and researchers understand the wisdom behind early agricultural practices.
Cultural Significance of Maize
Maize wasn’t just food; it was part of rituals and storytelling. Animated Mississippian Maize explores how indigenous people saw maize as a sacred gift. It played a role in ceremonies, myths, and social structures.
Key cultural aspects include:
- Spiritual Meaning: Many tribes viewed maize as a symbol of life.
- Community Bonding: Farming strengthened social connections.
- Oral Traditions: Stories about maize passed knowledge to future generations.
Understanding these traditions helps preserve indigenous heritage and respect their contributions to agriculture.
How Animation Educates Viewers
Digital tools make learning accessible. Animated Mississippian Maize simplifies complex historical concepts. It helps students visualize how farming shapes communities.
Benefits of Animation in Education
- Engages young learners with colorful storytelling.
- Provides a visual timeline of agricultural development.
- Connects history with modern sustainability practices.
With animation, Native farming traditions reach a broader audience. This ensures the preservation of cultural knowledge.
Modern Lessons from Ancient Farming
Traditional maize farming techniques still hold value today. Animated Mississippian Maize teaches modern farmers about soil health, crop rotation, and organic methods. These ancient practices align with sustainable farming goals.
Key Lessons
- Companion Planting: Boosts crop growth naturally.
- Soil Conservation: Prevents erosion and improves fertility.
- Natural Pest Control: Reduces the need for chemicals.
By studying indigenous methods, we can develop more eco-friendly farming systems.
Conclusion
Animated Mississippian Maize is more than just a visual story; it is a bridge between past and present. It honors Native farming traditions and educates audiences about sustainable agriculture. As we explore the wisdom of ancient farmers, we gain valuable insights into modern farming and cultural appreciation.
FAQs
1. Why is maize important in Native history?
Maize was a staple crop that supported entire communities. It played a crucial role in food, trade, and cultural traditions.
2. How does animation help preserve history?
Animation makes complex topics engaging and accessible. It visually demonstrates traditional farming techniques.
3. What farming methods did Mississippian cultures use?
They used techniques like the Three Sisters planting, crop rotation, and organic soil enrichment.
4. Can we apply these farming methods today?
Traditional methods promote sustainability, soil health, and efficient crop production.
5. Where can I watch Animated Mississippian Maize?
Educational resources and animations are found in museums, history websites, and Indigenous organizations.
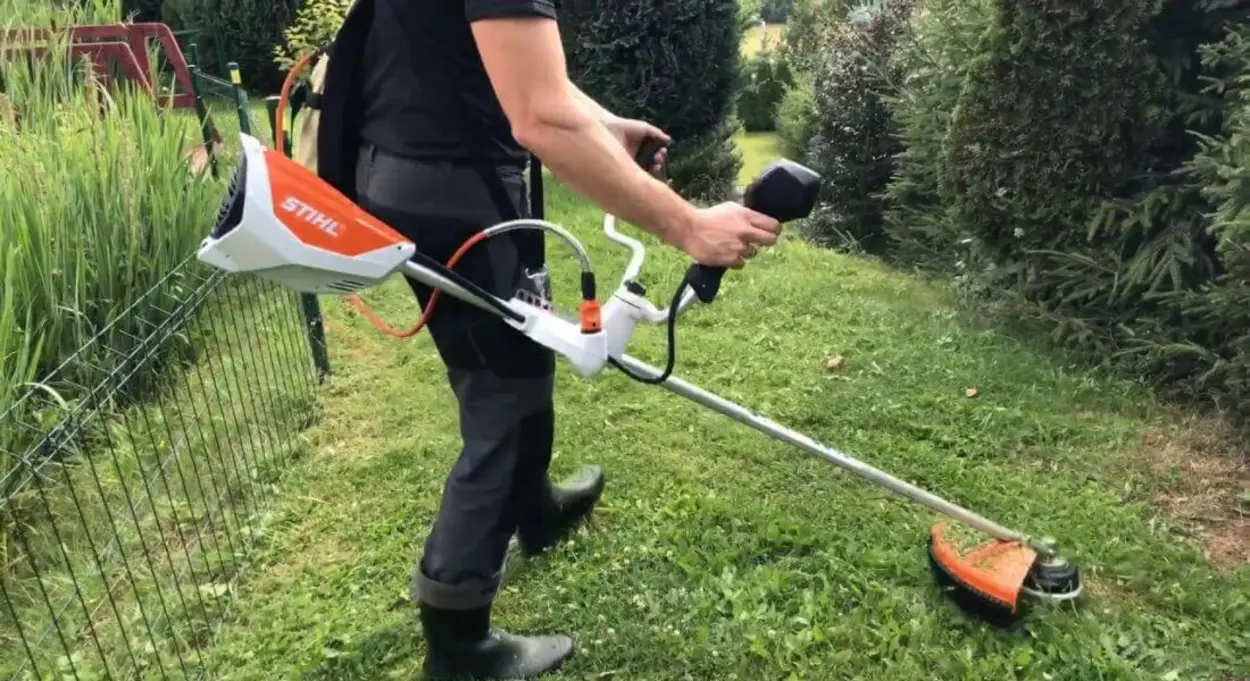
Managing thick vegetation and thorny brush requires a powerful tool. The Severe Duty Brush Cutter 06488 is designed to handle dense overgrowth, making land clearing easier and more efficient. Whether dealing with overgrown fields or rugged landscapes, this brush cutter ensures smooth operation. Its durable construction and sharp blades allow users to tackle challenging jobs effortlessly. This guide explores its features, benefits, and why it’s the best choice for heavy-duty land clearing.
Key Takeaways
- Severe Duty Brush Cutter 06488 is built for heavy-duty vegetation clearing.
- It provides durability, efficiency, and high performance for demanding jobs.
- It is ideal for farmers, landscapers, and landowners needing a reliable cutting tool.
- It features sturdy blades, a powerful motor, and ease of use.
- It is an excellent investment for maintaining large properties.
What is Severe Duty Brush Cutter 06488?
The Severe Duty Brush Cutter 06488 is a high-powered cutting tool for removing thick vegetation, shrubs, and small trees. Built with industrial-grade materials, it provides long-lasting performance in challenging environments.
Features of Severe Duty Brush Cutter 06488
- Heavy-duty steel frame for maximum durability.
- Sharp, high-performance blades for cutting through dense vegetation.
- Powerful motor that ensures efficient cutting.
- Easy attachment system for seamless connection to machinery.
- Safety features to protect the user during operation.

Benefits of Using Severe Duty Brush Cutter 06488
High Cutting Efficiency
The Severe Duty Brush Cutter 06488 is designed for maximum cutting performance. Its sharp blades and high-torque motor allow users to cut through thick brushes without difficulty.
“A powerful tool like this saves time and effort, making land clearing a breeze.”
Built for Tough Conditions
Unlike standard brush cutters, this model is specifically built for harsh conditions. It delivers reliable results on rocky terrains, dense fields, or wet landscapes.
Easy to Operate
This brush cutter has user-friendly controls, making it simple for professionals and beginners.
Long-Lasting Durability
With its reinforced steel frame and high-quality materials, this brush cutter ensures years of performance with minimal maintenance.
How to Use Severe Duty Brush Cutter 06488
Using the Severe Duty Brush Cutter 06488 correctly is essential for safety and efficiency. Follow these steps:
Setup and Safety Check
- Inspect the brush cutter for any damages or loose parts.
- Ensure all safety gear (gloves, goggles, boots) is worn.
- Attach it securely to the machinery.
Operating the Brush Cutter
- Start the machine and gradually increase speed.
- Move-in controlled smooth motions to prevent damage.
- Avoid rocky areas that may damage the blades.
“Proper operation ensures the longevity of your brush cutter and keeps you safe.”
Maintenance Tips
- Clean blades after every use to prevent rust.
- Oil moving parts regularly to reduce friction.
- Store in a dry area to maintain durability.
Why Choose Severe Duty Brush Cutter 06488?
Superior Performance
Its high-power motor and efficient design make it the best tool for clearing thick vegetation.

Versatility
Suitable for farms, landscapes, construction sites, and forestry, making it a multi-purpose tool.
Cost-Effective Investment
While it may seem like a significant investment, its long lifespan and efficiency save money in the long run.
“Investing in a high-quality brush cutter means fewer repairs and replacements.”
Conclusion
The Severe Duty Brush Cutter 06488 is an essential tool for those needing a robust, durable, and efficient solution for land clearing. Its muscular build, high performance, and easy handling make it one of the best brush cutters available. This brush cutter is the perfect choice if you need to maintain a large property with thick vegetation.
FAQs
1. How thick of vegetation can Severe Duty Brush Cutter 06488 handle?
It can easily cut through small trees, thick shrubs, and dense brush.
2. Is Severe Duty Brush Cutter 06488 suitable for beginners?
Yes, it features easy-to-use controls and safety features, making it accessible to all users.
3. How often should I maintain the brush cutter?
Regular blade cleaning, lubrication, and inspections will keep it in top condition.
4. Can it be used in wet conditions?
Yes, but avoid highly muddy areas to prevent clogging.
5. Where can I buy Severe Duty Brush Cutter 06488?
It is available at major hardware stores and online retailers specializing in heavy-duty equipment.

Key Takeaways
- Why is WBN only black and white? The artistic choice adds a classic and nostalgic feel.
- Black and white visuals create a unique cinematic impact.
- The format pays homage to classic films and storytelling.
- It enhances shadows, contrast, and atmosphere.
- Many fans love the timeless aesthetic.
Introduction
Black-and-white visuals have a charm that never fades. Many wonder why is wbn only black and white despite modern technology. The reason goes beyond nostalgia. This classic style enhances storytelling, mood, and emotion. The absence of color lets viewers focus on the details that matter. From classic films to modern projects, black-and-white still holds power. It captivates audiences in ways color sometimes cannot. But what makes it so popular even today? Let’s explore this in depth.
The Nostalgic Appeal
People love revisiting the past through black-and-white visuals. This style reminds viewers of early cinema, creating a sense of nostalgia. When WBN chose this format, it instantly resonated with classic film lovers.

Older generations who grew up watching black-and-white films feel an immediate connection to the style. Meanwhile, younger viewers appreciate its artistic and aesthetic appeal. Many modern filmmakers deliberately choose black-and-white to evoke certain emotions that color films often struggle to achieve. The simplicity of this format allows audiences to engage with the story in a more meaningful way.
“Black and white images carry a depth of emotion that color sometimes overshadows.” – Film Critic.
Enhancing Mood and Atmosphere
One key reason why is wbn only black and white is its ability to create an immersive atmosphere. The lack of color adds a layer of mystery and drama, making every scene visually compelling.
Shadows and lighting become more pronounced in black and white, helping filmmakers play with contrast and depth. This technique is beneficial in genres like horror and noir, where shadows convey hidden meanings and suspense. The stark contrasts enhance emotions, making every expression, movement, and setting more impactful.
By removing color, filmmakers ensure that viewers concentrate on the essence of each frame. Instead of being distracted by bright visuals, the audience focuses on character expressions, story arcs, and cinematic elements. This creates a deeper connection to the film and intensifies the viewing experience.
A Tribute to Classic Cinema
Using black and white is not just a creative choice; it’s also a tribute. Many iconic films were shot in this format, making it synonymous with Hollywood’s golden era. WBN embraces this tradition, keeping the essence of old cinema alive.
Classic films relied on strong storytelling, expressive acting, and striking cinematography—elements that remain relevant today. By adopting this style, WBN aligns itself with the legendary filmmakers of the past. It acknowledges cinema’s roots while offering something fresh for modern audiences.
“In a world of color, black and white stands out.” – Director’s Statement.
The Power of Simplicity
Simplicity often has a stronger impact than complexity. why is wbn only black and white because it strips away distractions and focuses on raw emotions.
Without the element of color, the human brain interprets visuals differently. Expressions appear more intense, environments feel more immersive, and storytelling becomes the focal point. Many great directors choose black and white to ensure their films remain timeless rather than tied to any particular era’s color trends.
Films shot in black and white also age better. While color palettes have become popular over the years, black and white remain consistent in their impact. This timeless appeal is why black and white remains an enduring choice for filmmakers and audiences alike.
Why It Continues to Resonate
Even in an era of high-definition and vibrant colors, black-and-white remains popular. Why? Because it offers something unique.
Digital enhancements, CGI effects, and oversaturated visuals often overwhelm modern audiences. In contrast, black-and-white provides a refreshing break from sensory overload. The format offers a minimalist aesthetic that feels deliberate, artistic, and emotionally powerful.
Additionally, streaming services and film festivals have reintroduced black-and-white films to newer generations. Independent filmmakers continue to experiment with the style, proving that it is far from outdated. As long as storytelling remains a priority, black-and-white will continue to have a place in cinema.
Conclusion
WBN, only in black and white, is still popular today for a simple reason—it works. It enhances storytelling, pays tribute to history, and offers a visually striking experience in a world dominated by color; black and white stand out. Whether for nostalgia, artistic impact, or mood enhancement, this classic style remains beloved.
Black and white filmmaking proves that strong narratives and compelling visuals do not need the crutch of color. It’s a testament to how simplicity can leave a lasting impact. Audiences will continue to embrace this format for its emotional depth, timeless appeal, and ability to transform storytelling into an art form.
FAQs
1. Why is WBN only black and white instead of color?
It enhances storytelling, creates nostalgia, and pays tribute to classic films. The choice is intentional and adds to the cinematic experience.
2. Does black and white improve the viewing experience?
Yes, it enhances contrast, mood, and emotional depth. Viewers focus more on characters and storytelling rather than being distracted by color.
3. Is black and white still used in modern films?
Yes, many directors choose black and white for artistic and storytelling reasons. Independent films, dramas, and experimental cinema often use black and white for their unique impact.
4. Why do people still enjoy black-and-white visuals?
Black-and-white visuals feel nostalgic, timeless, and unique compared to color films. They also emphasize lighting, shadows, and composition in a way that color cannot.
5. Will black and white ever become outdated?
Unlikely! As long as storytelling remains a priority, black and white will continue to have a place in media. Filmmakers will keep using it to create artistic and emotional depth.
The Ultimate Guide to Wedding Photographers in Tennessee
Choosing the Perfect Photographer in San Luis Obispo

Tips for Hiring Fence Contractors in Austin, TX

Understanding the Cost of HVAC Services in Austin TX

Superior Overland RV Service and Repair – Central Texas

TexCounsel by Steve Koebele – Expert Legal Guidance in Texas

AY Realty Group Real Estate Agents in Denton, TX

FintechZoom Best Crypto Trading Platform Features & Benefits

Fintechzoom BABA Stock Live Updates and Market Trends

Live Update of FintechZoom Chevron Stock Analysis & Forecast

FintechZoom DIS Stock Live Updates & Disney Analysis

FintechZoom SP500 Live Analysis & Investment Insights

FintechZoom GME Stock Analysis Trends, Risks & Future Outlook

FintechZoom Apple Stock Live Updates, Forecast & Analysis

NASDAQ FintechZoom Prediction Top Stocks & Trends 2025
Is Trading Is The Best Investment Option After Retirement?

What to Know Before You Start a Business?

Save on Campervan Rentals with a roadsurfer Gutscheincode

10 Things to Do in Punta Mita

Best Things to Do in New York City – Ultimate Travel Guide

How to Be the Best Real Estate Agent Murfreesboro

Find the Best Real Estate Agents Main Line

Explore New Real Estate Programs in Marrakech

The Ultimate Guide to 35mm Film Developing Lab

Guide to Buying Testosterone Propionate Safely and Effectively

Top Tips for Real Estate Agents in San Antonio

Serum Protein Electrophoresis: What Is It, and When Should It Be Done?

Why is there a white spot on my laptop screen?

Why WWE Saturday Night Main Event Was So Popular

Chris Datka New York: Bridging Creativity and Business in NY City
-
 Business3 months ago
What to Know Before You Start a Business?
-
 Travel2 months ago
Save on Campervan Rentals with a roadsurfer Gutscheincode
-
 Travel2 months ago
10 Things to Do in Punta Mita
-
 Travel2 months ago
Best Things to Do in New York City – Ultimate Travel Guide
-
 Real Estate2 months ago
How to Be the Best Real Estate Agent Murfreesboro
-
 Real Estate2 months ago
Find the Best Real Estate Agents Main Line
-
 Real Estate2 months ago
Explore New Real Estate Programs in Marrakech
-
 Photography3 months ago
The Ultimate Guide to 35mm Film Developing Lab